
Paint Projects That Return Real Value Without a Professional's Price Tag
From trim to kitchen cabinets, discover which interior paint projects homeowners can realistically tackle themselves for a fraction of the contractor cost.
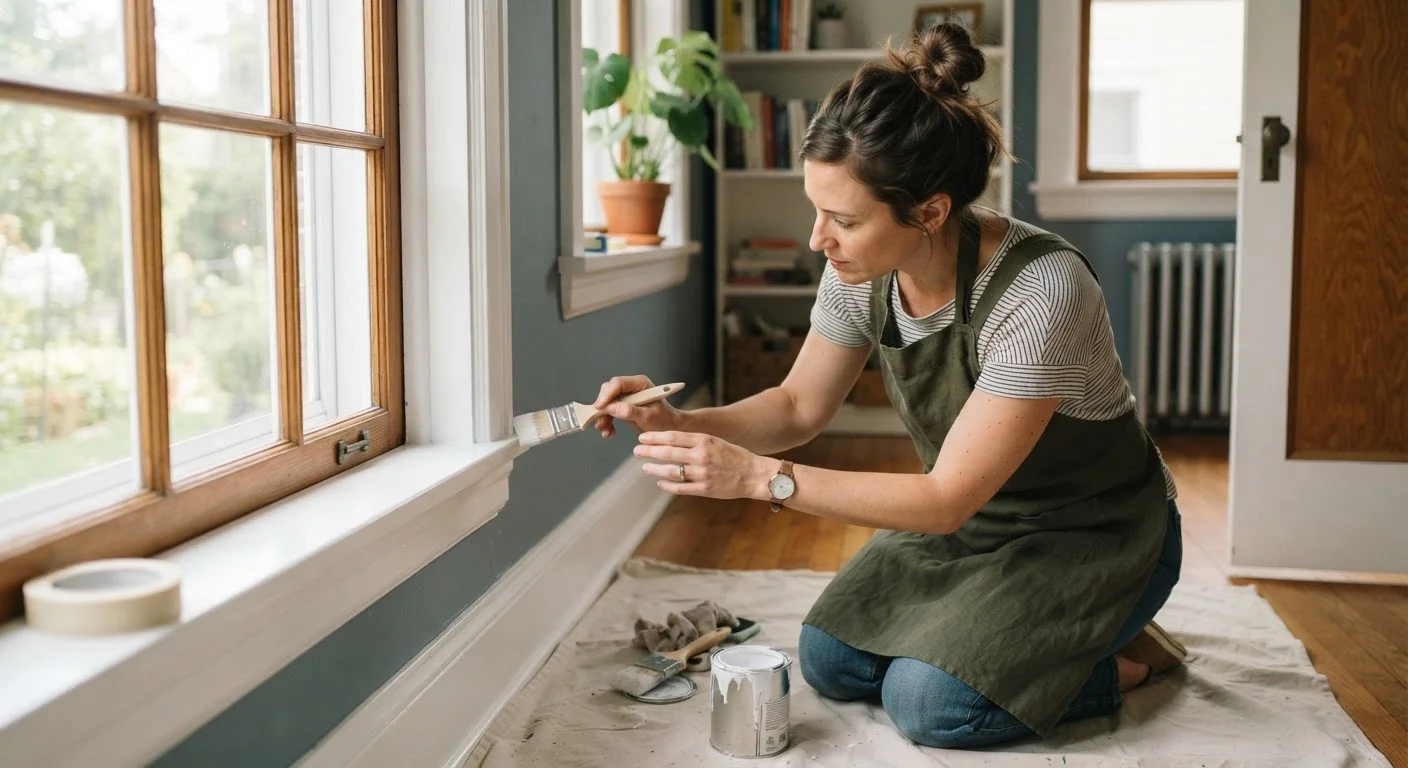
Photo: appropriateanswers.com editorial
—— In This Article
Key Takeaways
- Proper surface preparation determines whether a paint job lasts two years or ten.
- Cabinet painting can cost a fraction of full replacement while producing a comparable visual result.
- Accent walls and trim work are low-risk starting points for first-time DIY painters.
- Material quality matters more than speed; cheap brushes and rollers produce uneven finishes.
- Some projects, such as full exterior painting at height, carry real safety risks worth weighing honestly.
Why paint is one of the most forgiving DIY categories
Painting sits in a different category from electrical, gas, or structural work. Mistakes are rarely dangerous, permits are not required for interior painting, and most errors can be corrected with another coat. That low barrier to correction makes it a reasonable place for homeowners to invest time instead of money.
Contractor labor often accounts for 70 to 80 percent of a professional paint quote, according to general industry estimates. A homeowner who buys the same quality materials and does the work themselves can capture most of that gap. The trade-off is time and attention, not specialized credentials.
That said, some paint projects are more forgiving than others. The list below focuses on jobs where the skill ceiling is manageable, the materials are widely available, and the payoff in refreshed appearance or property value is real. For a broader perspective on where DIY effort pays off and where it backfires, see common DIY home improvement myths.
Accent walls in living rooms or bedrooms
A single painted accent wall is the most accessible project on this list. It involves one flat surface, no furniture to work around on multiple sides, and no cutting in around cabinets or complex trim. For a first-time painter, that simplicity matters.
The work is straightforward: clean the wall, apply painter's tape along the ceiling and adjacent walls, roll on a coat of primer if switching from a dark color or an unpainted surface, and apply two coats of finish paint. An angled brush handles the edges; a medium-nap roller covers the field. Total material cost for an average bedroom wall is typically well under $100.
Color choice has more practical weight than most homeowners expect. Darker, more saturated colors may need three coats for full coverage, which increases material use and drying time. Testing a sample patch first avoids that surprise.
A single accent wall costs well under $100 in materials and requires no specialized skills.
Interior trim and baseboards
Trim painting looks difficult because the results are visible at close range, but the technique is straightforward once you slow down. The key is cutting in carefully with a 2-inch angled sash brush, moving in the direction of the wood grain, and letting each coat dry fully before applying the next.
Scuff-sanding existing trim with 120-grit sandpaper before painting gives the new coat something to grip. Wiping down with a damp cloth afterward removes dust. A quality satin or semi-gloss finish holds up to cleaning and contact better than flat paint, which matters for baseboards near floors.
One session with a professional trim painter for a typical home can cost several hundred dollars. A homeowner doing the same job over a weekend spends on materials only.
Scuff-sanding before painting is the single step most DIYers skip, and it matters most for trim.
Kitchen cabinet repainting
Cabinet painting is the most labor-intensive project on this list, but also the one with the largest potential savings relative to the alternative. Full cabinet replacement can run into the thousands; repainting the existing boxes and doors costs a fraction of that if you supply the labor.
The process involves removing all doors and hardware, cleaning every surface thoroughly with a degreaser (kitchen cabinets accumulate grease that paint will not bond over), sanding, priming with a bonding primer, and applying two to three coats of a durable finish. Cabinet-specific paints, which dry harder than standard wall paint, hold up better in high-use kitchens.
This is a multi-day project. Rushing the dry time between coats produces brush marks and soft surfaces that chip quickly. Homeowners who go slowly, with good materials, routinely get results that last five or more years.
Cabinet repainting costs a fraction of replacement but requires degreasing, bonding primer, and patience.
Ceilings in low-traffic rooms
Ceiling painting intimidates homeowners primarily because of physical discomfort: working overhead is tiring, and drips are hard to avoid at first. The actual technique is not complex. Flat white or off-white ceiling paint applied with a long-handled roller covers most surfaces in two coats.
The practical approach is to cut in the perimeter with a brush first, let that dry, then roll the field. A roller extension pole reduces the need to climb repeatedly and keeps arms less fatigued. Drop cloths over everything in the room are not optional; ceiling paint drips reliably.
Ceilings do not take much visual abuse and rarely need repainting often. When they do, a fresh coat has an outsized effect on how bright and clean a room feels, for a low material cost.
A roller extension pole makes ceiling painting far less tiring and reduces the need to use a ladder.
Front door and exterior entry trim
The front door and the trim directly around it have a disproportionate effect on curb appeal. They are also a contained, ground-level project that does not require scaffolding or ladders beyond a step stool.
Prep here is critical. Sand any peeling paint back to bare wood or to a stable layer, fill gaps or cracks with exterior-grade spackle, and use a primer rated for exterior wood before applying the finish coat. Exterior paints contain additives for UV resistance and moisture, so using interior paint outside will shorten the life of the job significantly.
A painted front door typically takes one or two coats of a satin or semi-gloss exterior paint. Darker colors absorb heat in direct sun, which can cause bubbling over time; this is worth considering in climates with strong afternoon sun exposure.
Front door painting is ground-level work with an outsized effect on how a home presents from the street.
Bathroom walls and vanity areas
Bathrooms benefit from fresh paint more visibly than almost any other room because the surfaces are close together and the space is small. A bathroom repaint can take a single afternoon. It also requires attention to product selection: standard wall paint absorbs moisture and grows mildew in a poorly ventilated bathroom. Paint with a mildew-resistant additive, or a product formulated for high-humidity interiors, is the practical choice here.
Surface prep in bathrooms includes wiping down walls with a mildew-killing solution if any growth is visible, and letting everything dry completely before painting. Paint applied over active mildew will not solve the underlying problem and will peel sooner. A good bathroom exhaust fan, running during showers, does more for paint longevity than any particular product upgrade.
Mildew-resistant paint is not a luxury in bathrooms; it is the practical minimum for lasting results.
Getting the most from your paint investment
Across every project on this list, one principle holds: prep time is not optional. Skipping cleaning, sanding, or priming shortcuts the job and shortens how long the finish holds. Peeling paint within a year is almost always a prep failure, not a product failure.
Invest in better brushes and rollers
Material quality has a larger effect on finish quality than most first-time painters expect. A cheap foam roller leaves texture; a quality woven roller lays paint smoothly and holds more product per pass. The same applies to brushes: a good angled sash brush holds its shape and releases paint evenly. Better tools also clean up well and last through multiple projects, so the cost spreads across jobs.
Paint projects also connect to the broader logic of routine home maintenance. A fresh coat on exterior trim, for example, seals out moisture and extends the life of the wood underneath. Skipping it has a cost that compounds over time, as routine maintenance deferral tends to do. The same discipline that makes a paint project successful, doing it right before it becomes urgent, applies across most of what a house needs to stay in good condition.

Home On A Budget Editorial Team
Home on a Budget Editorial Team is the collective byline for our editorial team and contributor network. Articles published under this byline or an editorial pen name are researched, written, and reviewed according to our editorial standards for clarity, consistency, and independence before publication.
View author profile