
Composting at Home: Everything a First-Timer Needs to Know
A complete introduction to backyard and indoor composting for beginners, covering bin types, materials, timelines, and how to use finished compost.
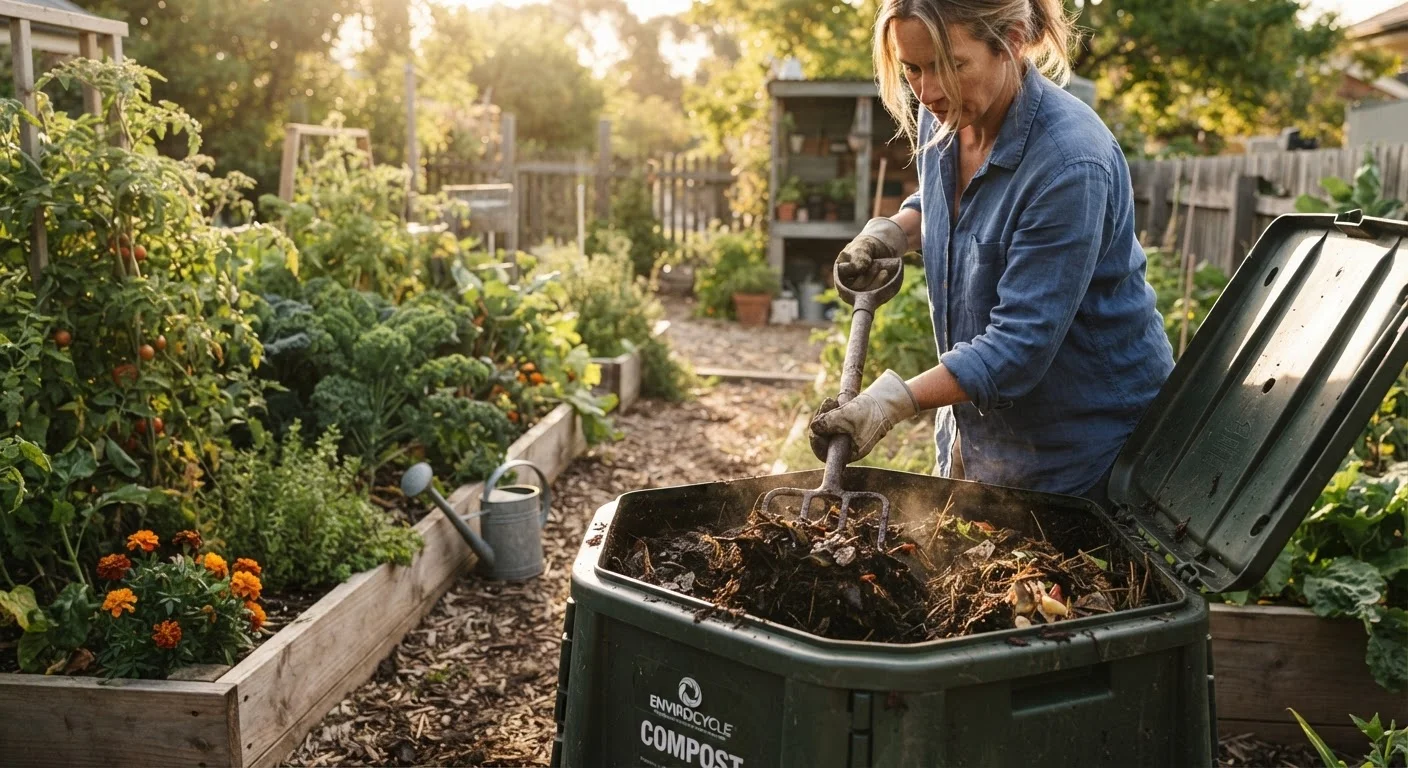
Photo: appropriateanswers.com editorial
—— In This Article
Key Takeaways
- Composting converts kitchen and yard waste into free soil amendment, cutting your fertilizer spending.
- Outdoor bins suit most yards; indoor worm bins work for apartments or small spaces.
- A healthy pile needs a rough balance of carbon-rich browns and nitrogen-rich greens, plus moisture.
- Most backyard piles produce usable compost in two to six months with regular turning.
- Finished compost improves soil structure, water retention, and plant nutrition without synthetic inputs.
Why composting makes sense for homeowners
Bagged compost and synthetic fertilizer add up fast over a gardening season. Home composting turns material you already generate, fruit peels, coffee grounds, grass clippings, dry leaves, into a soil amendment you would otherwise pay for. The process costs little to start and nothing to run once you have a system going.
There is also a practical waste-reduction benefit. The U.S. Environmental Protection Agency estimates that food and yard debris together account for a significant share of what American households send to landfills each year. Diverting that material into a compost pile reduces your trash volume and the associated landfill fees in municipalities that charge by weight or bag.
For value-focused homeowners, the math is straightforward: a bin or pile that handles vegetable scraps, cardboard, and leaves can reduce or eliminate the need to buy bagged amendments for vegetable beds, flower borders, and lawn overseeding.
Browns
Carbon-rich materials like dry leaves, cardboard, and straw that provide energy for decomposing microbes and keep the pile from getting soggy.
Greens
Nitrogen-rich materials like vegetable scraps and grass clippings that feed microbes and speed up decomposition.
Vermicomposting
A composting method that uses worms, typically red wigglers, to break down food scraps inside a contained bin.
Finished compost
Fully decomposed organic material that looks and smells like dark, crumbly soil and is ready to use as a garden amendment.
Aerobic decomposition
The breakdown of organic matter by microbes that need oxygen to work, which is faster and less smelly than anaerobic (no-oxygen) decomposition.
Leachate
Liquid that drains from a worm bin during vermicomposting. Diluted with water, it can be applied to plants as a liquid fertilizer.
Choosing your composting method
The method you choose depends on your space, the volume of material you generate, and how hands-on you want to be.
Outdoor bin composting
A plastic tumbler or open-sided bin placed in the yard handles the largest volume and requires the least investment per pound of finished compost. Tumblers speed decomposition because they are easy to turn and retain heat, but they fill up quickly in large households. Open bins or simple three-sided wood-pallet enclosures cost almost nothing to build and scale as needed.
Open pile (no bin)
A freestanding pile at least three feet wide and three feet tall holds enough mass to generate internal heat and decompose efficiently. This is the lowest-cost option. The tradeoff is slower breakdown in cold weather and a slightly higher chance of attracting wildlife, though that risk drops sharply if you avoid adding meat or cooked food.
Vermicomposting (worm bins)
Red wiggler worms process food scraps inside a contained bin that fits in a garage, basement, or under a sink. This method works without outdoor space and produces vermicompost, a fine, nutrient-dense amendment, along with liquid leachate that can be diluted and used as a liquid fertilizer. A basic worm bin can be built from two plastic storage totes for a few dollars.
What to put in (and what to keep out)
A healthy compost pile needs two categories of material: carbon-rich browns and nitrogen-rich greens. Neither alone works well; the combination feeds the microbes that do the actual decomposing.
Browns (carbon sources)
- Dry leaves
- Cardboard and paper (shredded, ink is generally safe)
- Straw or hay
- Wood chips or sawdust from untreated wood
- Paper bags and newspaper
Greens (nitrogen sources)
- Fruit and vegetable scraps
- Coffee grounds and paper filters
- Grass clippings (thin layers to avoid matting)
- Fresh garden trimmings
- Eggshells (not a nitrogen source but add calcium and improve structure)
Keep these out
Meat, fish, bones, dairy products, and oily or cooked foods should stay out of a backyard pile. They decompose slowly, produce foul odors, and attract rodents and other pests. Pet feces can carry pathogens that a home pile may not reach temperatures high enough to destroy. Diseased plant material and anything sprayed with persistent pesticides can introduce problems into the finished product.
Avoid these common mistakes with greens
Thick layers of grass clippings mat together and block airflow, creating a slimy, anaerobic layer that slows decomposition and produces odor. Add grass in thin layers and mix it with dry material each time. Also avoid adding large amounts of any single green material at once; variety helps the microbial community stay balanced.
Managing your pile for faster results
Decomposition happens on its own, but a few habits speed the process considerably.
Moisture
The pile should feel like a wrung-out sponge: damp but not dripping. In dry climates or summer heat, you may need to water it occasionally. In wet climates, a simple tarp or lid keeps excess rain from waterlogging the material and slowing airflow.
Turning
Turning the pile every one to two weeks moves oxygen through the material, which feeds aerobic bacteria and generates heat. A pile that reaches internal temperatures between 130 and 160 degrees Fahrenheit kills most weed seeds and pathogens. If you turn less often, decomposition still happens but takes longer.
Particle size
Smaller pieces decompose faster because microbes have more surface area to work on. Chop or shred large scraps before adding them. Breaking down cardboard or thick stems into smaller pieces can cut weeks off the timeline.
Carbon-to-nitrogen ratio
A rough guideline is two to three parts browns for every one part greens by volume. If your pile is wet and smells like ammonia, add more browns. If it is dry and barely decomposing, add greens and a small amount of water.
Using finished compost in your yard and garden
Finished compost is dark, crumbly, and smells like earth. It no longer resembles the original materials. If some chunks remain, screen them out with a half-inch mesh or hardware cloth and return those pieces to your active pile.
Vegetable and flower beds
Work two to four inches of compost into the top six to eight inches of soil before planting. For established beds, apply one to two inches as a surface dressing each spring and let earthworms incorporate it over the season.
Lawn top-dressing
A thin layer (about a quarter inch) spread over an existing lawn improves soil structure, feeds grass roots, and can help thin or compacted areas recover. Apply it after aerating for best soil contact.
Potting mix amendment
Mix compost at roughly 20 to 30 percent of total volume into potting soil for containers. Pure compost in pots can hold too much water, so blending it with existing mix or perlite works better.
Mulching
Apply a two- to three-inch layer around trees and shrubs as mulch. It suppresses weeds, retains moisture, and feeds the soil as it breaks down further. Keep it a few inches away from trunks to prevent rot.
Frequently Asked Questions

Home On A Budget Editorial Team
Home on a Budget Editorial Team is the collective byline for our editorial team and contributor network. Articles published under this byline or an editorial pen name are researched, written, and reviewed according to our editorial standards for clarity, consistency, and independence before publication.
View author profile